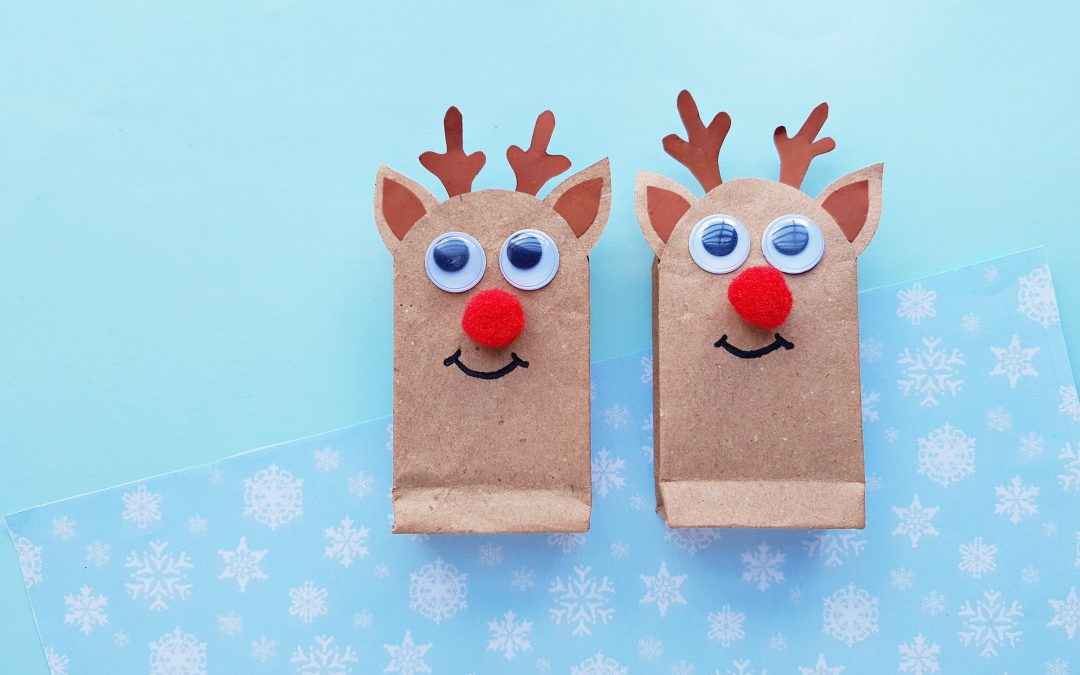
Whether your kids are officially on their winter holiday break or you’re just wondering how in the world you’re going to keep them busy over the holidays, this mini reindeer gift bag craft is the perfect activity!
Create your own set of reindeer paper toys, turn them upside down for a paper puppet, or use them as gift bags for your holiday party or gift giving.
What You’ll Need:
- Brown paper
- Dark brown craft paper
- Red-colored pompom
- Googly eyes
- Pencil
- Scissors
- Craft glue
Make the Christmas Craft!
For this craft, we’re going to show you how to use brown paper or butcher paper to create the bag yourself, but you can also adapt these steps and use a brown paper bag.
Step 1
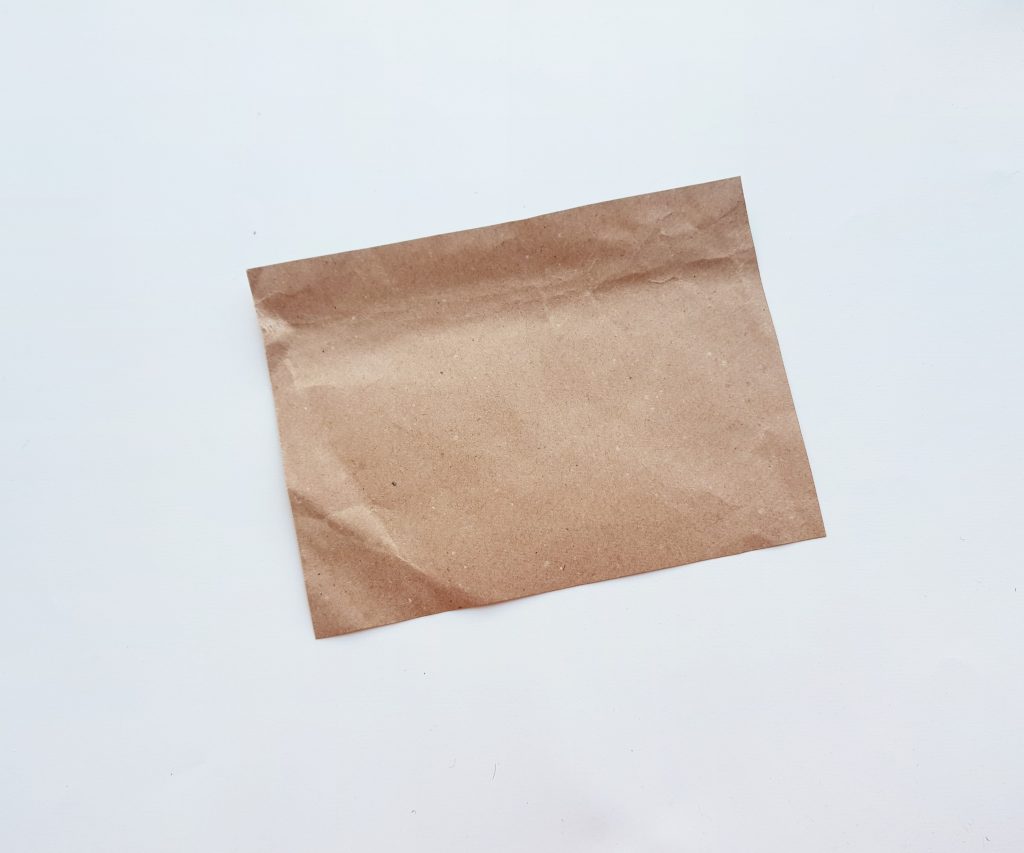
Cut a piece of brown paper of 8.5 inches x 5 inches to make the reindeer gift bags. You can choose any size you want as long as the ratio stays the same.
Step 2
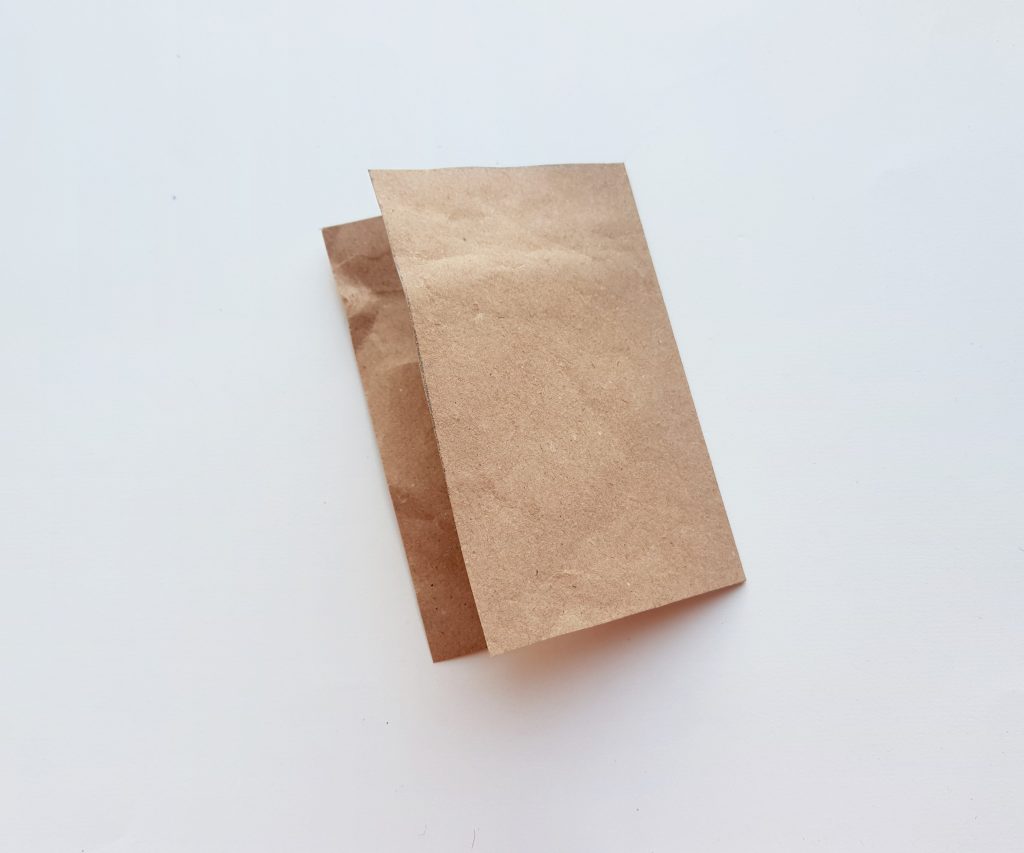
Leaving 0.5 inches along the longer side, fold the 8 inches part into half.
Step 3
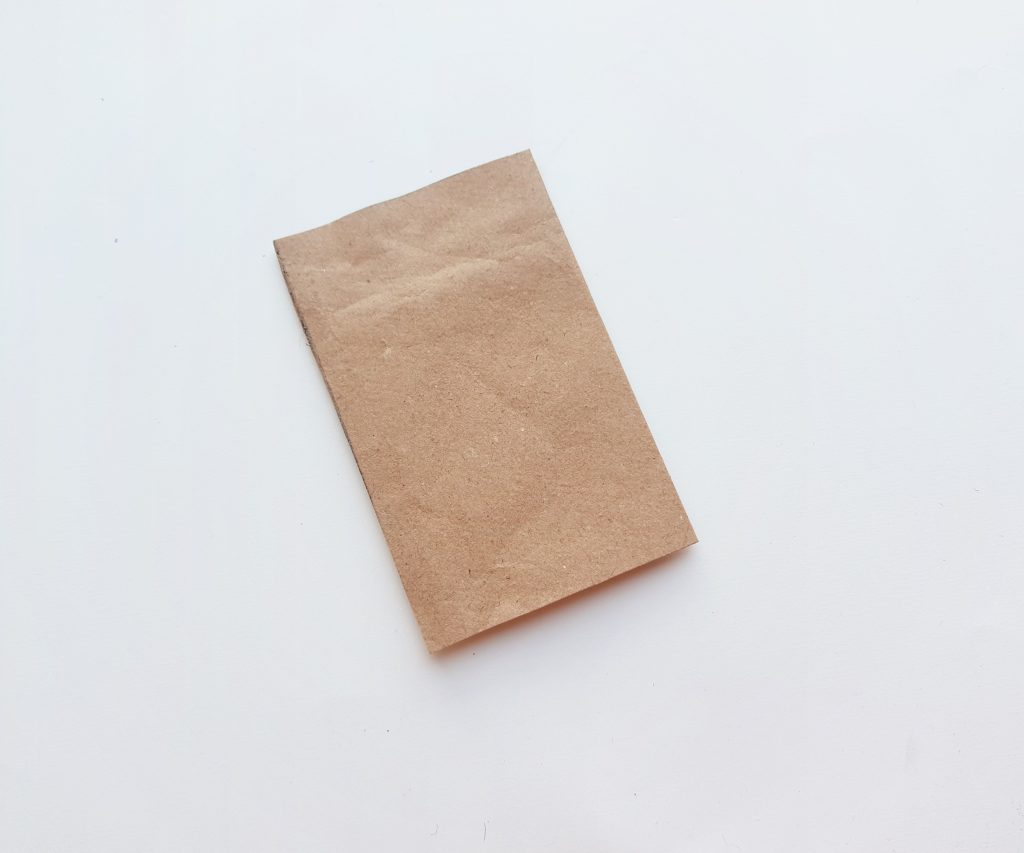
Apply glue along the extra 0.5 inch part and fold the glued part to attach it with the other open end of the folded brown paper.
Step 4
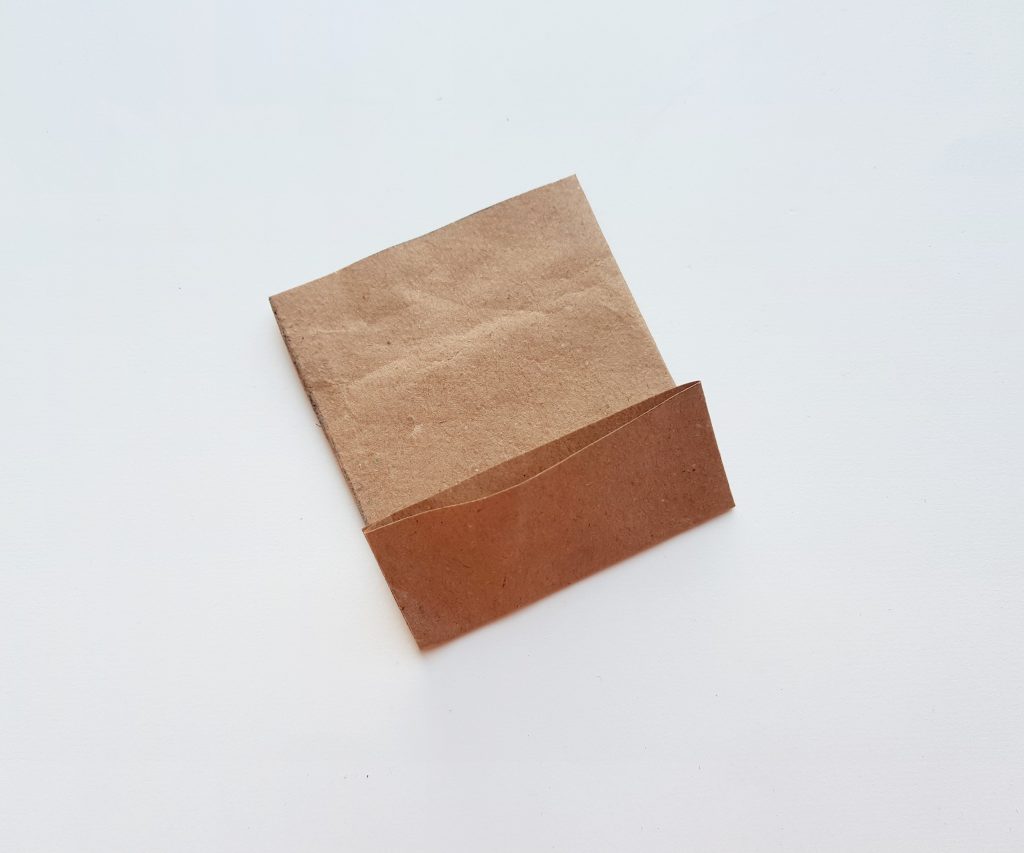
Fold up 2 inches (of the 5 inches side) from any open end of the paper.
Step 5
Open up the folded-up part and nicely flatten the 2 sides evenly. This will form 2 open sides, 1 on the top and 1 on the bottom. Also, notice the line along the middle.
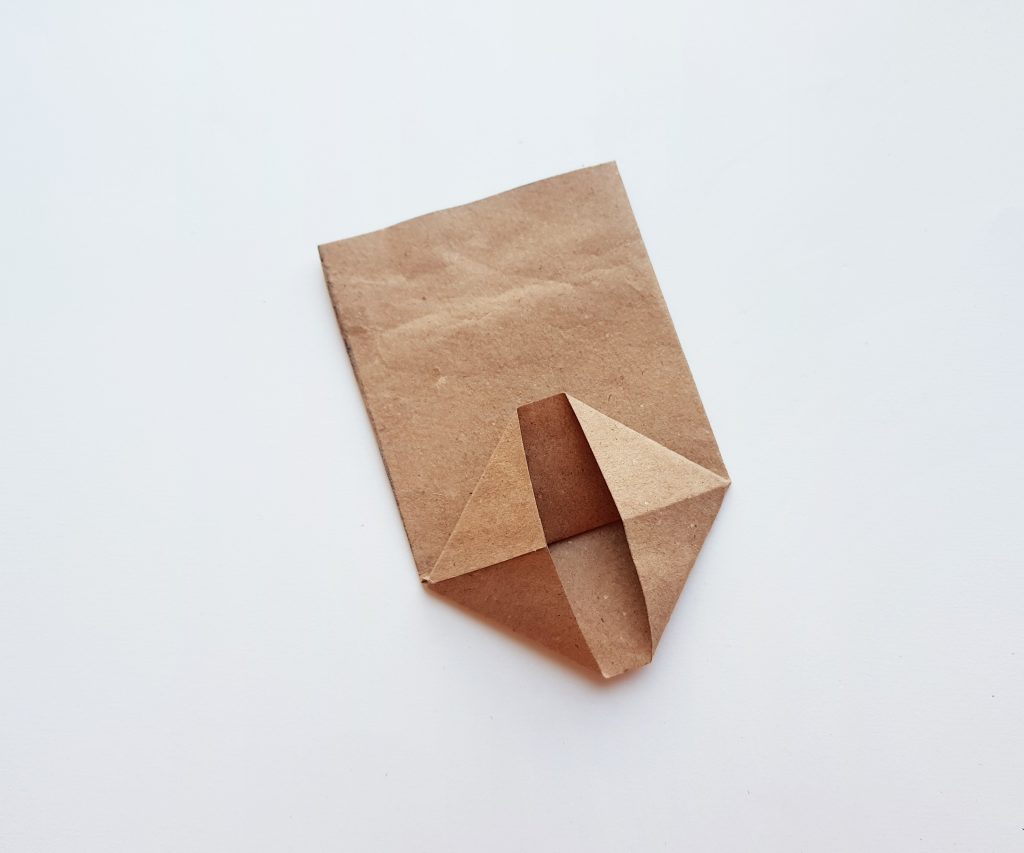
Step 6
Fold down the top open end towards the middle line and overlap the middle line by about a cm.
Step 7
Now, fold up the bottom side of the open end and overlap the middle line by a cm again.
Both sides will overlap each other.
Apply glue on the overlapped parts to attach them. This will secure the bottom side of the paper bag.
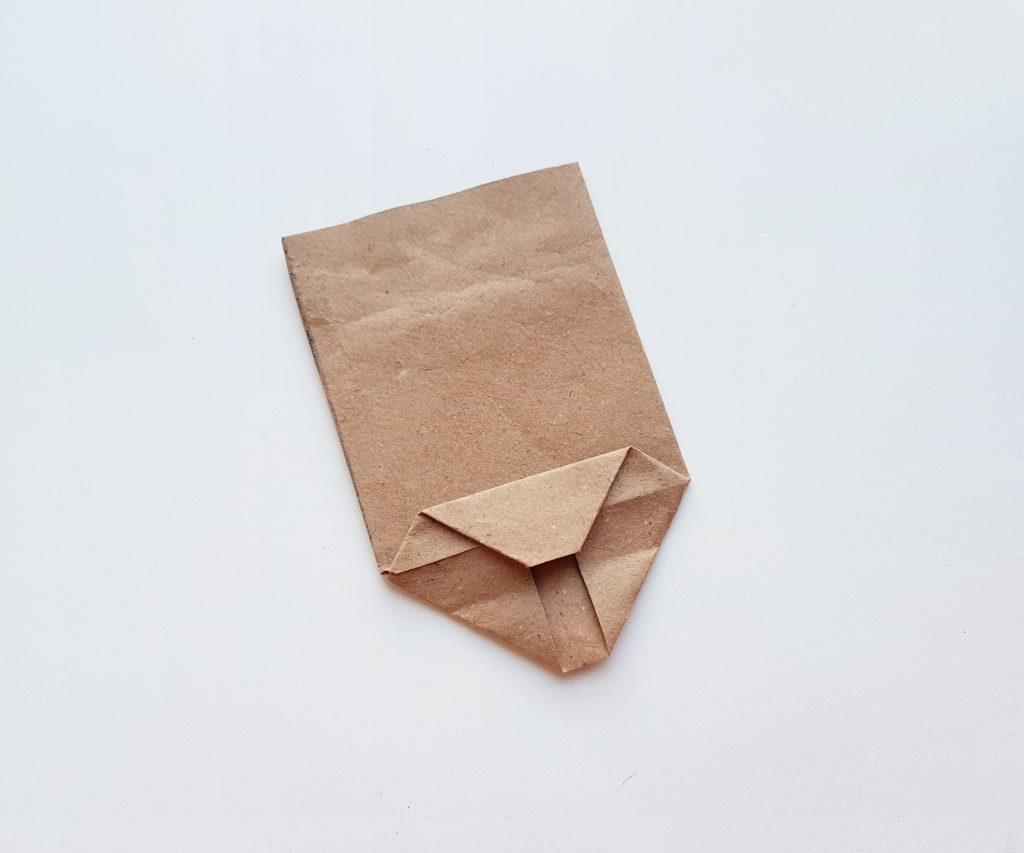
Step 8
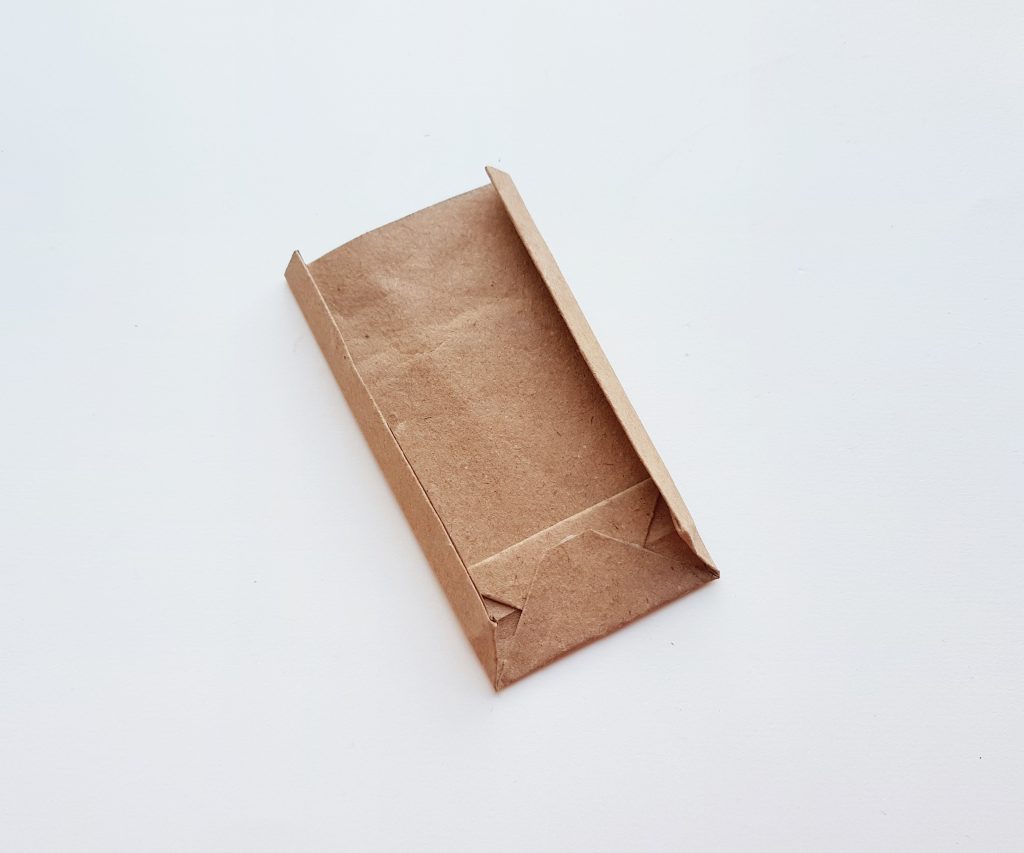
Notice the 2 square parts on both sides of the bottom. Create folds on both sides of the paper bag by using the opposite corners of the squares as a guide.
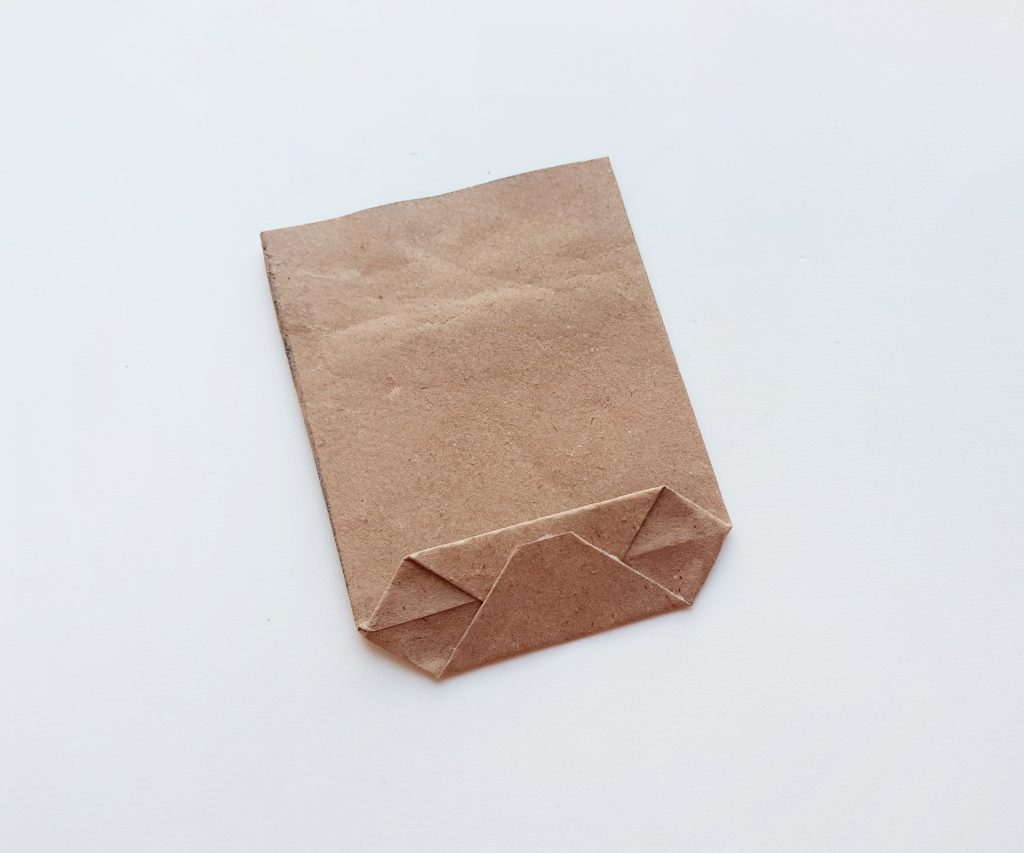
Step 9
Now open up the paper bag from its flattened position.
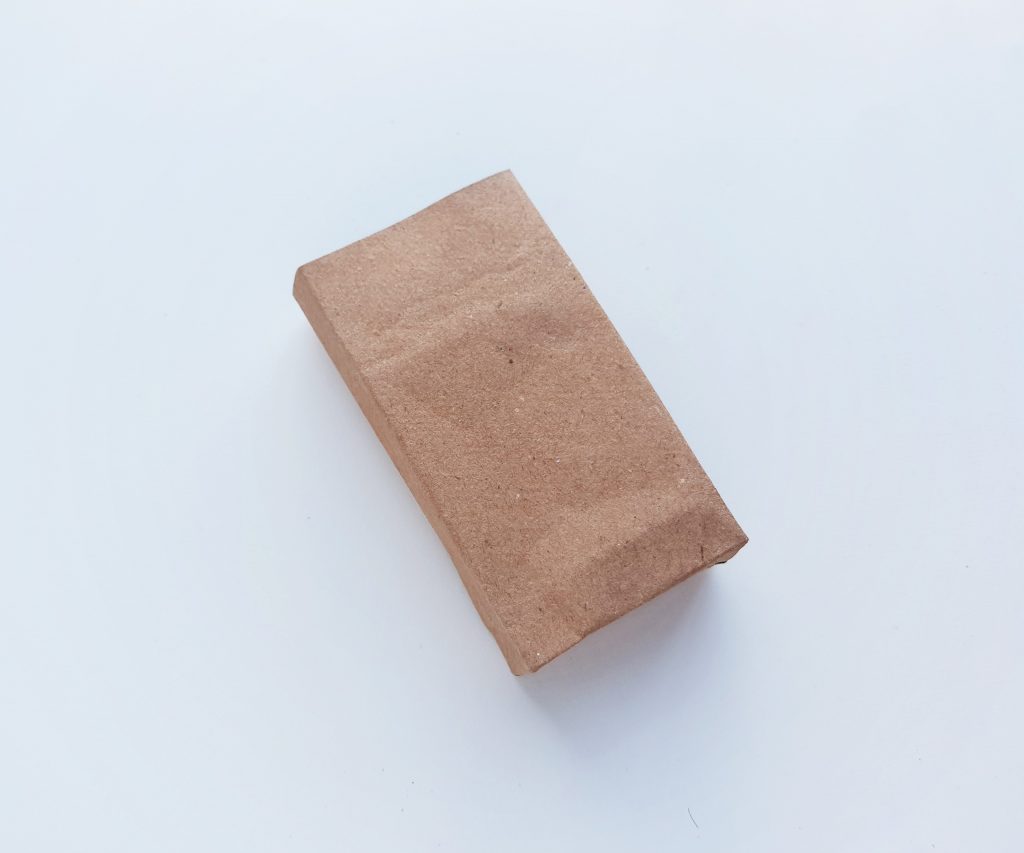
Step 10
Fold in the side middle lines of the paper bag and flatten the bottom side of the bag.
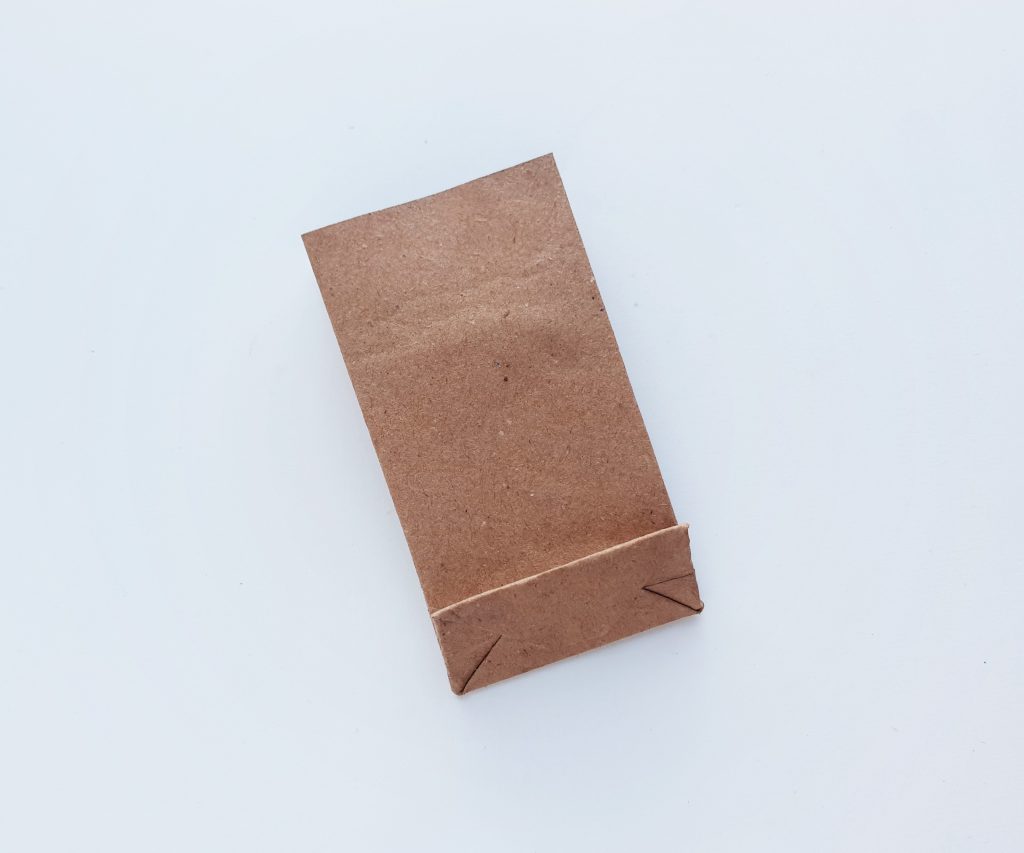
Step 11
Use scissors to cut a semi-circular shape on the top side of the paper bag.
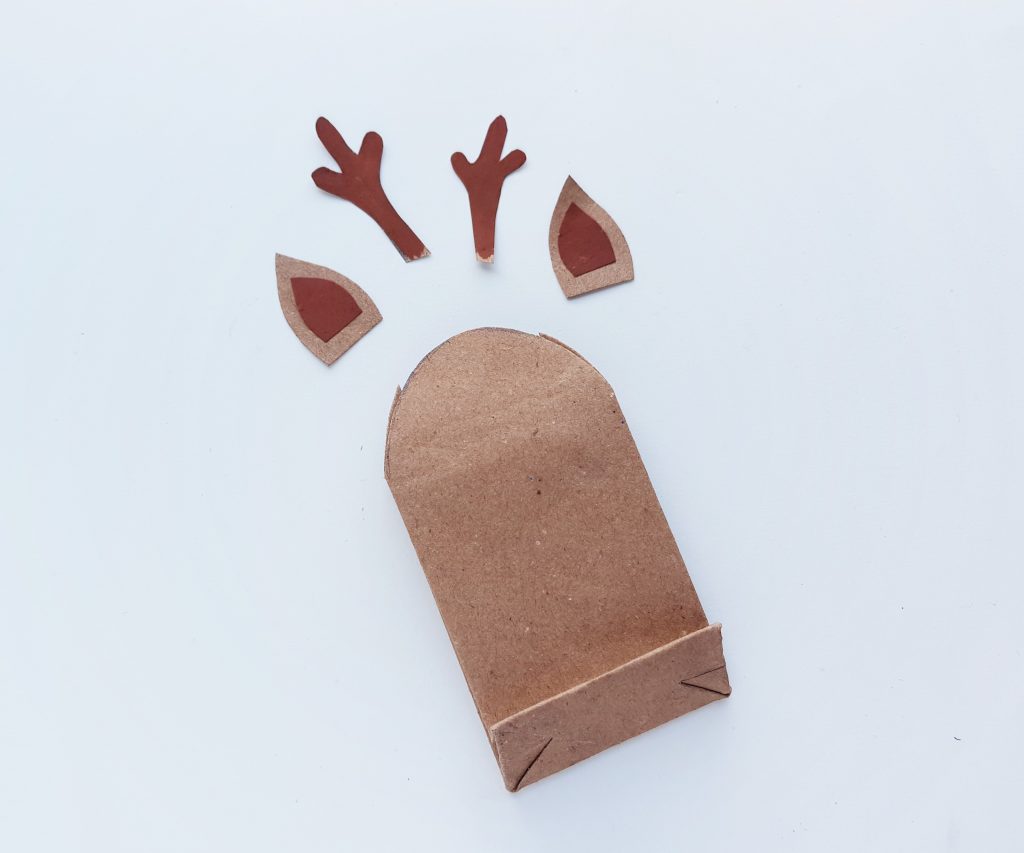
Cut out ear patterns (2 inner ear parts from dark brown paper and 2 outer ear parts from light brown parts) and 2 horn patterns from dark brown paper.
Step 12
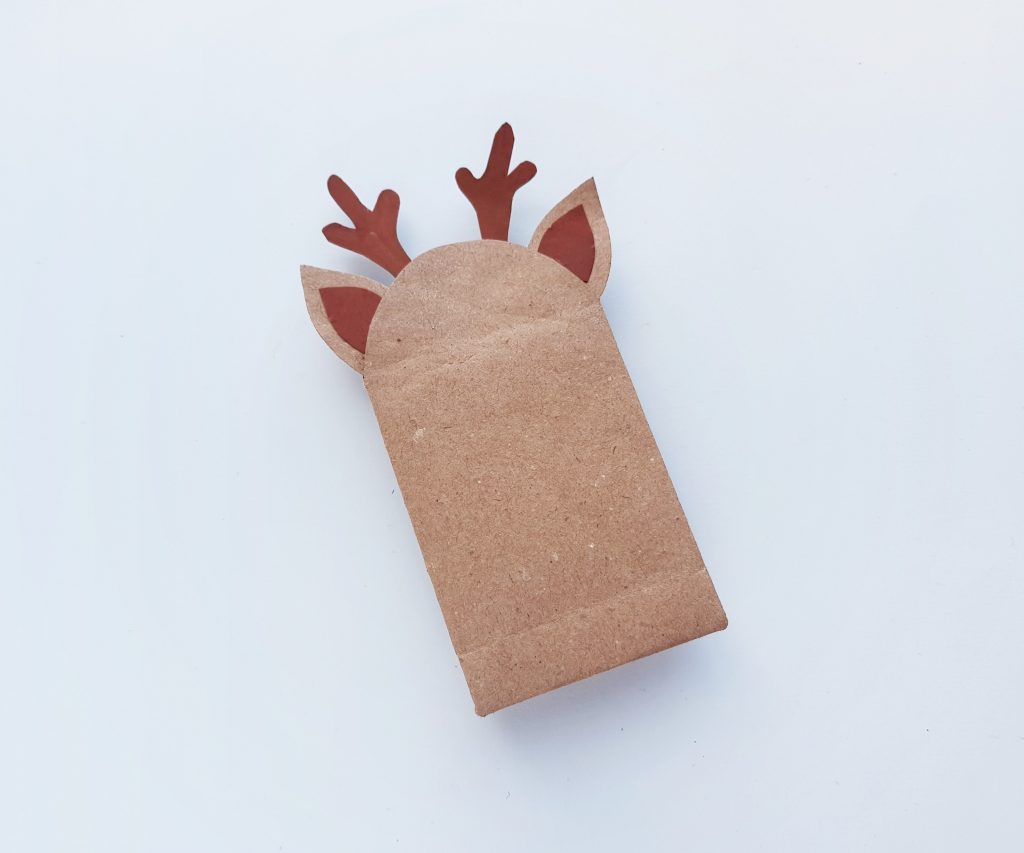
Attach the horns and ears along the top end (front side) of the paper bag.
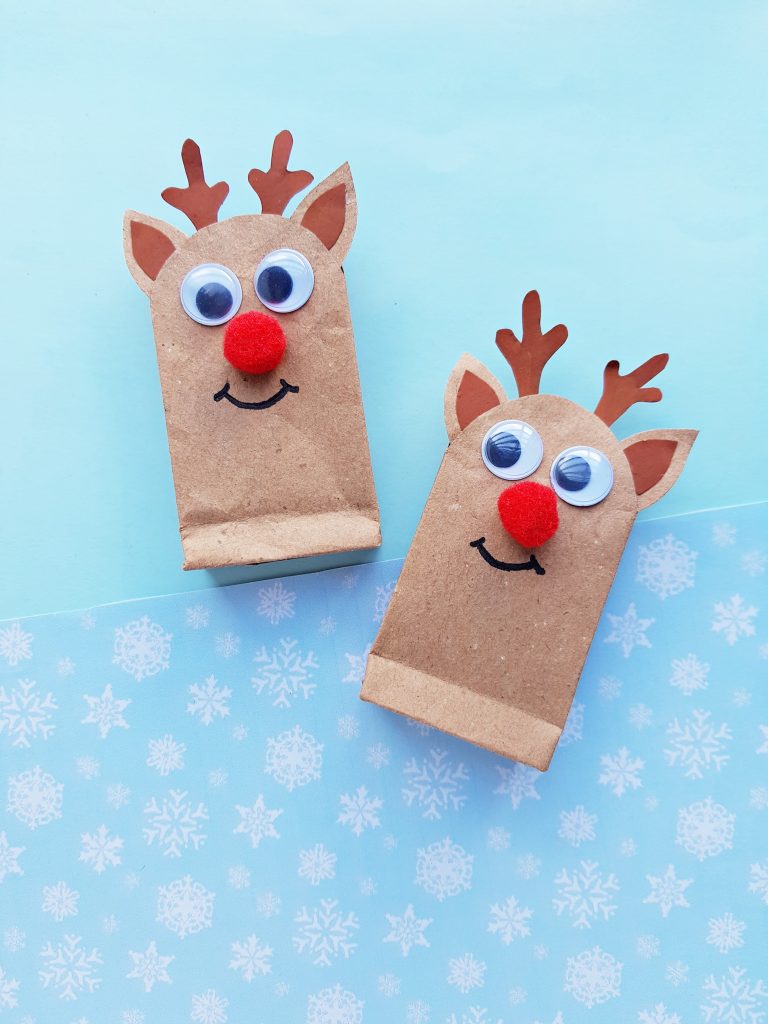
Step 13
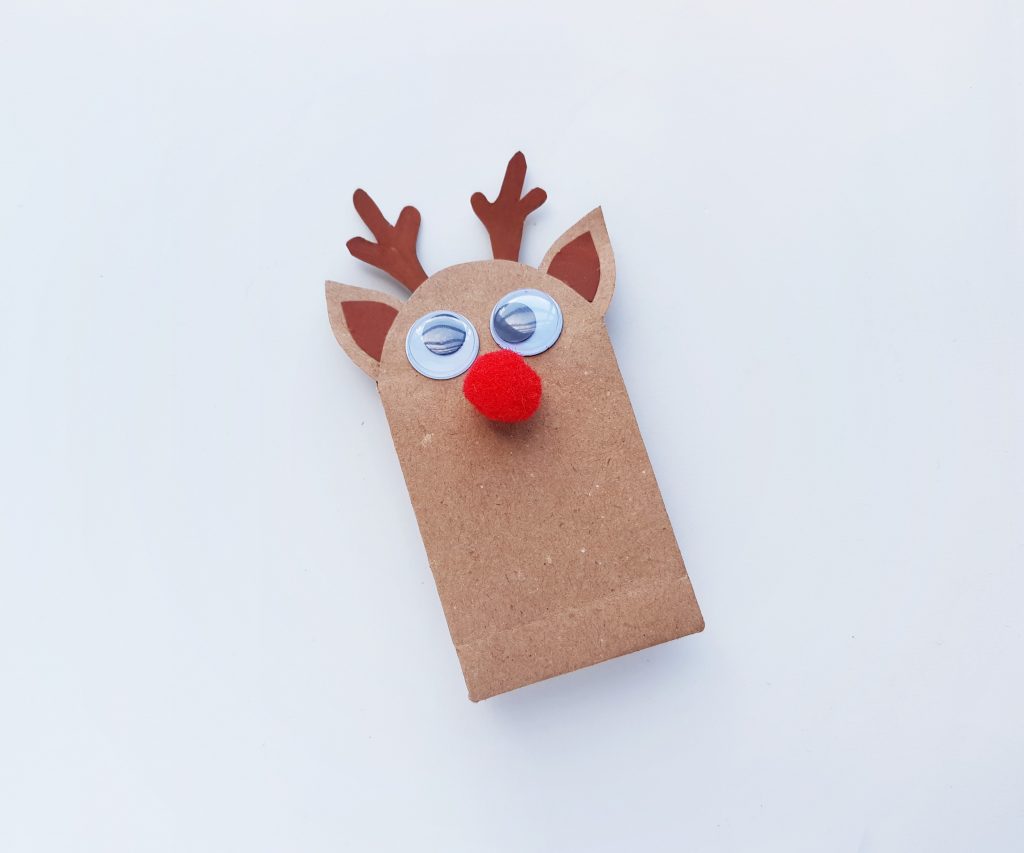
Attach the googly eyes and pompom nose to complete the reindeer bag. Then use a black marker to draw on a smiling face!
Ta da!
This is a wonderful winter craft for kids when you don’t have a brown paper bag handy, but you can also adapt it to use a simple brown paper bag if that’s more your style.
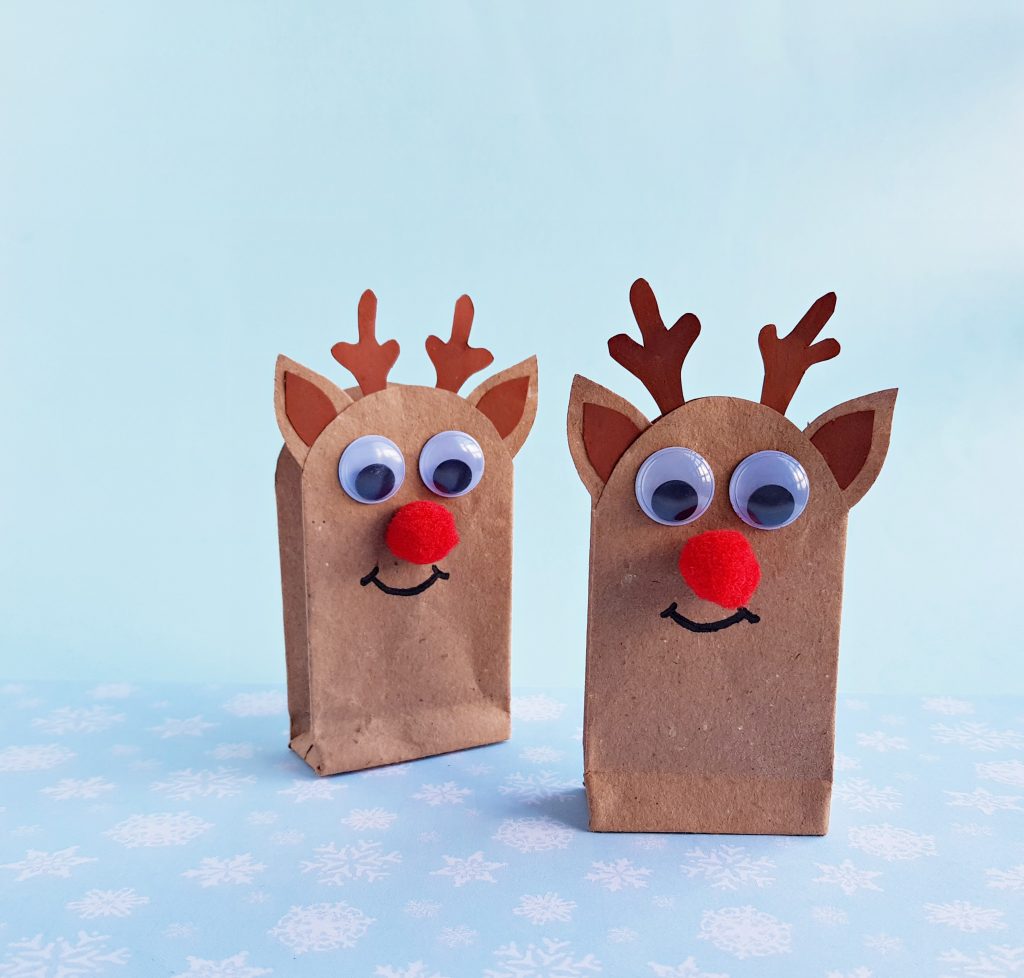
You can even attach your reindeer ears, horns, and faces upside down to make paper bag puppets.
Enjoy your craft time and happy holidays from Carilly!